Inviting an employee
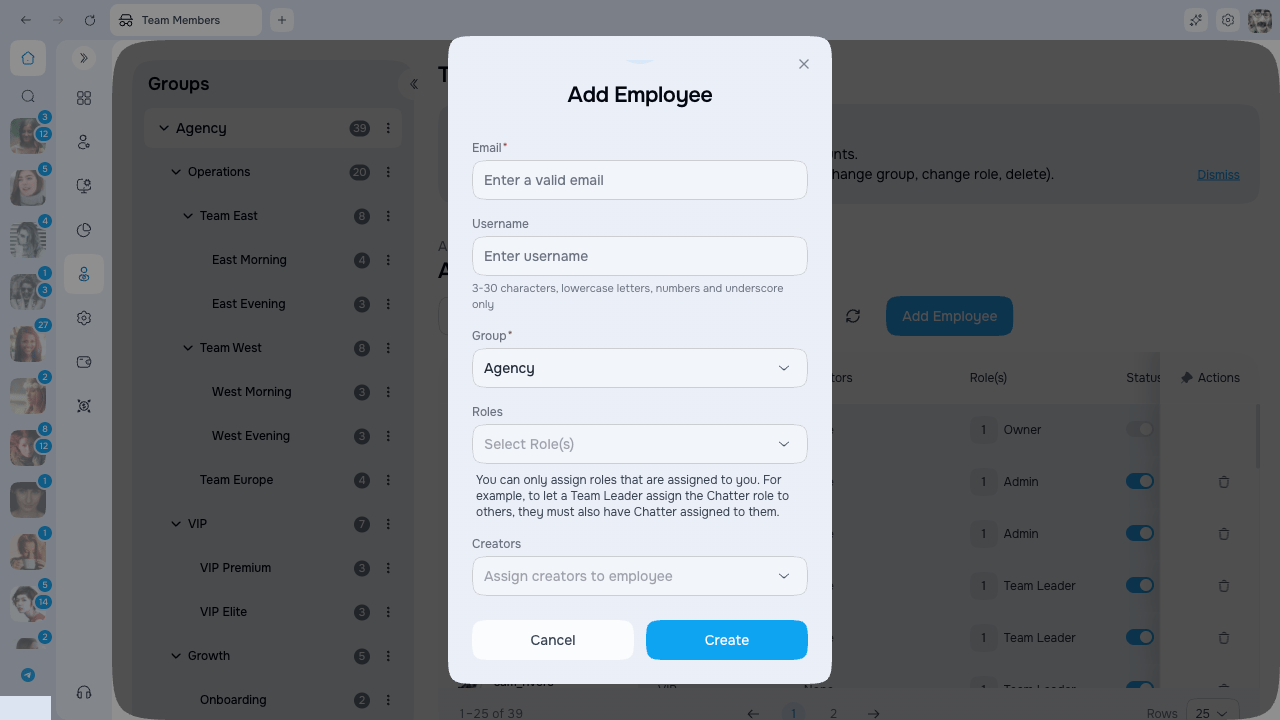
- Click Add Employee
- Fill in the form:
- Click Create
Employee statuses
Changing status
Use the toggle in the Status column:- On → Active
- Off → Inactive
Canceling an invite
For employees with Inviting status:- Click the trash icon in the Status column
- Confirm cancellation
Deleting an employee
You can remove an employee from the table entirely:- Click the trash icon in the Actions column
- Confirm deletion in the dialog
There is no self-service restore action for a removed employee. Removal does not erase historical actions, reports, or audit records that the agency or service must retain. Invite the email again if the person should return.
Editing inline
Click on a cell to edit:- Group → Change group
- Creators → Assign creators
- Roles → Assign roles
Role assignment restrictions
Which roles you can assign depends on your own role:
Role assignment and employee-management scope are separate permissions. A person can see an employee but still be unable to assign a particular role.